将个人网站迁移到ECS上并配置SSL连接(二)
将个人网站迁移到ECS上并配置SSL连接(二)
准备部署网页代码文件
我们首先转到用户目录下,创建一个保存网页文件的文件夹page,如下。
root@VM-24-8-ubuntu:/home/myproject# mkdir blogsite
root@VM-24-8-ubuntu:/home/myproject# mkdir page
root@VM-24-8-ubuntu:/home/myproject# mv page blogsite/
root@VM-24-8-ubuntu:/home/myproject# cd blogsite/
root@VM-24-8-ubuntu:/home/myproject/blogsite#
此时点击Xshell上的Xftp图标开启Xftp,上传网页源文件。
此时分别找到位于本机上的网页源文件路径与云服务器的page文件夹路径。
右键public(网页源文件)并选择传输即可将public文件夹中的内容传输到云服务器下的page文件夹下。此时关闭Xftp,回到Xshell中,检查是否传输成功。
root@VM-24-8-ubuntu:/home/myproject/blogsite# ls
page
root@VM-24-8-ubuntu:/home/myproject/blogsite# cd page
root@VM-24-8-ubuntu:/home/myproject/blogsite/page# ls
public
root@VM-24-8-ubuntu:/home/myproject/blogsite/page# ls -al public/
total 12
drwxr-xr-x 2 root root 4096 Mar 18 17:39 .
drwxr-xr-x 3 root root 4096 Mar 18 17:39 ..
-rw-r--r-- 1 root root   87 Mar 18 17:38 index.html
root@VM-24-8-ubuntu:/home/myproject/blogsite/page#
能够成功查找到public即成功。然后在page目录下创建文件夹card。
root@VM-24-8-ubuntu:~/page# cd ~/page/
root@VM-24-8-ubuntu:~/page# mkdir card
root@VM-24-8-ubuntu:~/page# ls
card  public
再次打开Xftp,将此前预备的SSL证书压缩包上传到云服务器的card文件夹下,然后使用unzip命令解压。
root@VM-24-8-ubuntu:~/page# cd card
root@VM-24-8-ubuntu:~/page/card# ls
7777777_www.ymonad.top_nginx.zip
root@VM-24-8-ubuntu:~/page/card# unzip 7777777_www.ymonad.top_nginx.zip
Archive:  7777777_www.ymonad.top_nginx.zip
Aliyun Certificate Download
inflating: 7777777_www.ymonad.top.pem
inflating: 7777777_www.ymonad.top.key
root@VM-24-8-ubuntu:~/page/card# ls
7777777_www.ymonad.top.key  7777777_www.ymonad.top_nginx.zip  7777777_www.ymonad.top.pem
接下来我们准备开始配置nginx。
配置nginx
首先我们需要找到nginx的安装目录,一般情况下nginx安装在etc目录下。
root@VM-24-8-ubuntu:~/page/card# cd /etc/nginx/
root@VM-24-8-ubuntu:/etc/nginx# ls
conf.d        fastcgi_params  koi-win     modules-available  nginx.conf    scgi_params      sites-enabled  uwsgi_params
fastcgi.conf  koi-utf         mime.types  modules-enabled    proxy_params  sites-available  snippets       win-utf
进入sites-enabled目录将里面的default删除掉。
root@VM-24-8-ubuntu:/etc/nginx/sites-enabled# ls
default
root@VM-24-8-ubuntu:/etc/nginx/sites-enabled# rm default
然后需要使用vim(未安装就用vi)编辑nginx.conf文件。
root@VM-24-8-ubuntu:/etc/nginx# pwd
/etc/nginx
root@VM-24-8-ubuntu:/etc/nginx# vim nginx.conf
摁下“i”健进入编辑模式,将第一行的user后的www-data改为云服务器的用户名(华为云是root,腾讯云是ubuntu),然后摁下“esc”键退出编辑模式。然后输入“:wq”退出vim。
进入conf.d文件夹,使用touch命令创建一个page.conf文件。
root@VM-24-8-ubuntu:/etc/nginx# pwd
/etc/nginx
root@VM-24-8-ubuntu:/etc/nginx# cd conf.d/
root@VM-24-8-ubuntu:/etc/nginx/conf.d# touch page.conf
root@VM-24-8-ubuntu:/etc/nginx/conf.d# ls
page.conf
使用vim对page.conf进行编辑,将以下内容输入。
|
|
请先根据注释修改相应的配置,然后写入并保存到page.conf文件中(PS:使用Xshell的右键可以轻松粘贴内容到远端服务器)。
此时我们先检查一下配置是否合乎语法。
root@VM-24-8-ubuntu:/etc/nginx/conf.d# nginx -t
nginx: the configuration file /etc/nginx/nginx.conf syntax is ok
nginx: configuration file /etc/nginx/nginx.conf test is successful
出现successful字样即为合规,接下来就可以启动nginx了(我们先停止nginx再启动,以防之前不小心启动了)。
root@VM-24-8-ubuntu:/etc/nginx/conf.d# nginx -s stop
nginx: [error] invalid PID number "" in "/run/nginx.pid"
root@VM-24-8-ubuntu:/etc/nginx/conf.d# service nginx start
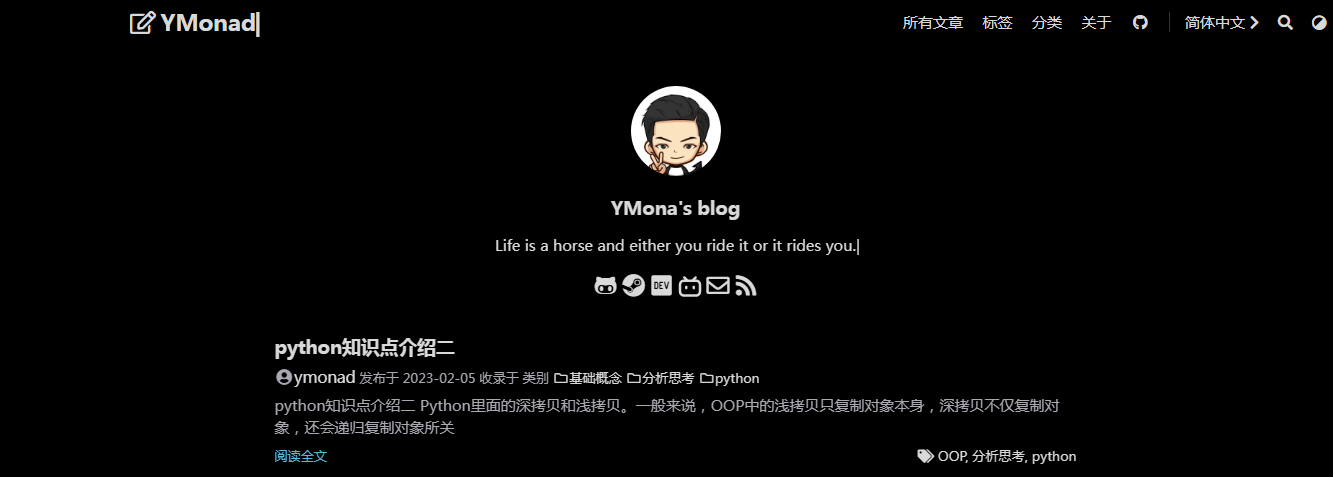
以上就大功告成了,直接在使用你的域名地址即可检查是否成功。
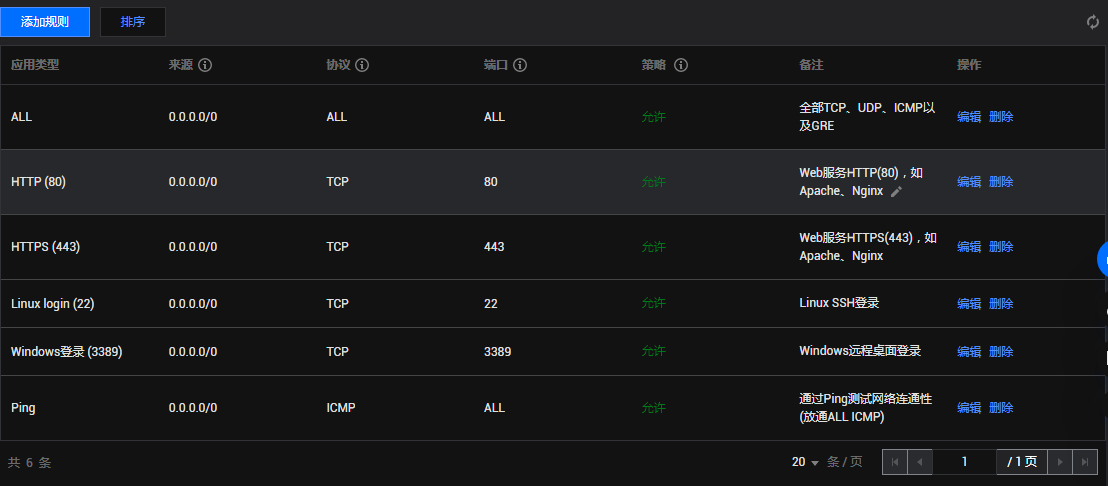
如果加载不出页面,可以检查一下云服务器的安全组设置是否正确,需要开启80与443端口。
80端口是http端口,443是https用的,设置成任何接入都允许。
结束语
以上就是使用云服务器与nginx架设网页并支持Https访问的全部步骤。 如果阅读过程中有疑问,联系博主,博主都会尽力解答。:)


